
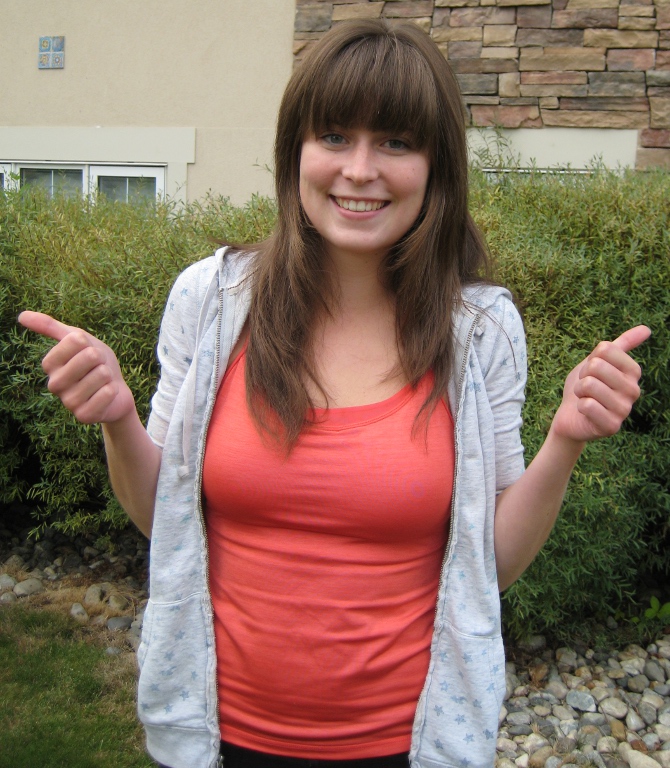
To open a file, go to File->Open and browse to your image. Below is the original image we will be using for this tutorial. Click here to download the image.

The first thing we will do is adjust the colour of the whole picture. Go to Colours->Brightness-Contrast and adjust the values however you like.

Original Image |
Image With Brightness=30, Contrast=20 |
 |

|
Go to the layer palette. (If you cannot see the layer palette, press Ctrl+L to bring it up.)
In the layer palette, rename the layer with your image "Background". To rename a layer, double-click on the name of the layer and type in the new name. Then right-click on the Background layer and click on Duplicate Layer.

Repeat the Duplicate Layer process again. Rename this new layer to "Blur".

On the Blur layer (you'll know it's selected if it's highlighted in the layer panel) we are going to apply (shockingly!) a blur. Go to Filters->Blur->Gaussian Blur. Set the values to get an appropriate blur for the size of your picture. (For example, we will use 8.0 pixels for our 768x880 picture, but a picture of size 2100x2400 would look better with a blur of 22.0 pixels.) Make sure both the horizontal and vertical blur radius are the same. Click Ok. In the layers palette, click-and-drag the Blur layer under the Background Copy layer.


Now we will apply a layer mask to the Background Copy layer.
The term "masking" comes from traditional photography, in which masked parts of a photo will not be exposed and/or developed in a dark room. Traditional photographers use this techique to compose photos with different overlays.
In short, a layer mask is linked to a layer and hides part of the layer from the picture. What is painted black on the adjustment layer will not be visible in the final picture. In our sample picture, we want the smooth skin of the Blur layer, but we also want rest of the details of the Background Copy layer. As a result, we will mask parts of the face, so the underneath smooth skin will be visible, while the rest of the picture remains untouched.
To add a layer mask, right-click on the Background Copy layer and click Add Layer Mask. Make sure it is set to White (full opacity) and click Add.

In the layer palette, the eye icon beside each layer indicates that layer is visible. Click on the eye in front of the Blur layer and Background layer to make them invisible for now.

Select the paintbrush tool from the toolbox and change the size of the brush by draggin the mouse left or right over the size box, or typing in a number.

Now, start painting on parts of the face. Avoid facial features like the eyes and lips. This is easier if you zoom in. Press + to zoom in. If you make a mistake, you can undo it by pressing Ctrl+Z.

When you are done painting, click the eye in front of the bottom two layers again to make them visible. You should see smoother skin wherever you painted the mask.
Image With Brightness=30, Contrast=20 |
Image With Skin Fixed |
|

|
The depth-of-field is determined when taking the picture. However, by blurring the background, one can achieve almost the same effect as pictures taken by SLRs. By doing so, it also makes the viewer focus more on the subject.
Change the brush size by moving the size slider further to the right.

Make the bottom two layers invisible again and paint over the background. Make sure you don't paint over your subject. When you're done, make the bottom two layers visible again.
Image With Skin Fixed |
Image With Depth-Of-Field |
|
| 
|
Go to Image->Canvas Size. Change the Canvas Size values so they are bigger than your original picture. (This only affects the size of canvas, not the size of the image). Then click Centre to centre the image.

To add a new layer, go to Layer->New Layer.

Select the paintbucket tool and click on your photo to paint the entire new layer black.
Like we did before, click-and-drag the new layer so it's at the bottom.
Image With Depth-Of-Field |
Image With Border |
|
| 
|
Here is our original image and our final image.
Original Image |
Final Image |
|
|
|